Weather For Your Arduino – WeatherPiArduino
How to Buy SwitchDoc Labs Products
Within United States: SwitchDoc Labs Store – Powered by Amazon (Now with Amazon Prime!)
Outside of United States: Tindie.com
WeatherPiArduino is a weather station controller board designed to interface to

Arduino and Raspberry Pi computers. It is an interface board developed by SwitchDoc Labs to allow the user to easily build a fully functioned Weather Station while allowing customization of functions.
The WeatherPiArduino Weather board is now available on the SwitchDoc Store (Prime Shipping!) , Amazon (Prime Shipping!) and Tindie.com.
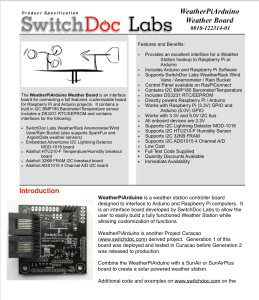
The WeatherPiArduino Weather Board is an interface board for connecting a full featured, customizable board for Raspberry Pi and Arduino projects. It contains a built in I2C BMP180 Barometer/Temperature sensor, includes a DS3231 RTC/EEPROM and contains interfaces for the following:
- SwitchDoc Labs WeatherRack (in stock soon!) Anemometer/Wind Vane/Rain Bucket

WeatherRack Weather Sensors (also supports SparkFun and ArgentData weather sensors)
- Embedded Adventures I2C Lightning Detector MOD-1016 board
- Adafruit HTU210-F Temperature/Humidity breakout board
- Adafruit 32KB FRAM I2C breakout board
- Adafruit ADS1015 4 Channel A/D I2C board
Software Results
Here are the results directly from the WeatherPiArduino running on an Arduino Mega 2560. Note that the WeatherRack Weather Sensors are not hooked up for this run. You can see the BMP180 Barometer / Temperature sensor, the HTU21D-F Humidity Sensor, the AT24C32 EEPROM and the DS3231 Real Time Clock results. There are actually three temperature sensors and all reading different temperatures! We are inclined to believe the BMP180 over the others. You can also see the EEPROM being written to and read back.
WeatherPiArduino 1.10 01/15/2014
Compiled at:21:12:49 Jan 21 2015
port number = 9600
------------------------------------
Sensor: BMP085
Driver Ver: 1
Unique ID: 10085
Max Value: 300.00 hPa
Min Value: 1100.00 hPa
Resolution: 0.01 hPa
------------------------------------
time=5307
micro time=5308104
 FAIL WIND DIRECTIONwindSpeedMin =0.00 windSpeedMax =0.00
windSpeedBuffer= 0.00||0
windGustMin =0.00 windGustMax =0.00
windGustBuffer= 0.00||0
windDirectionMin =0.00 windDirectionMax =0.00
windDirectionBuffer= 0.00||0
 currentWindSpeed=0.00 currentWindGust=0.00 Wind Direction= FAIL WIND DIRECTION0.00 Cumulative Rain = 0.00 memory free=3165
---------------
DS3231 Clock
---------------
18:17:32, Date (D/M/Y) = 23/01/2015
Temperature= 19.50
---------------
AT24C32 EEPROM
---------------
Write 5 addresses with random numbers and read them back
Address: 0 Write:216
Address: 1 Write:49
Address: 2 Write:25
Address: 3 Write:164
Address: 4 Write:128
Address: 0 Read Value:216
Address: 1 Read Value:49
Address: 2 Read Value:25
Address: 3 Read Value:164
Address: 4 Read Value:128
---------------
BMP180
---------------
Pressure: 958.71 hPa
Temperature: 19.30 C
Altitude: 464.31 m
---------------
HTU21D-F
---------------
Temperature: 20.24 C
Humidity: 40.36 %
---------------
The Arduino is also working with the RasPiConnect/ArduinoConnect Control Panel (see RasPiConnect tutorial here). We are adding more to the Control Panel as we speak.

Hooking WeatherPiArduino up to your Arduino
Hooking up the WeatherPiArduino is very straight forward. You need to connect up the  power (3.3V), ground and the I2C bus. You then connect the Interrupts from the WeatherRack Instruments as well as the Wind Vane output to an A/D channel. Check out the WeatherPiArduino specification for more information. Below is the Fritzing diagram for the Arduino Mega 2560.


Is your Fritzing component for the WeatherPiAdruino available somewhere?
You bet.
It is at https://github.com/switchdoclabs/SDL_Fritzing_Parts
SDL
Is your fritzing component for the WeatherPiArduino available for download somewhere?
You bet.
It is at https://github.com/switchdoclabs/SDL_Fritzing_Parts
SDL